Wednesday, 27 May 2020
SHOPIFY THEME SLIDER EDIT

--------------------------------------------------------------------------------------------------------------------------
SHOPIFY IMAGE SIZE AND TEXT WRAP SIZE
MORE:
https://swiperjs.com/demos/
https://www.themelock.com/ecommerce/687008031-drone-single-product-shopify-theme.html
https://www.templatemonster.com/shopify-themes/apparelix-clean-multipurpose-shopify-theme-87247.html#ProductGeneral
https://www.shopify.co.uk/partners/blog/jquery-image-zoom#vanillajavascriptzoom
--------------------------------------------------------------------------------------------------------------------------------------------------
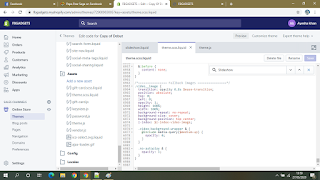
SHOPIFY JS CSS SCSS LINK IN THEME LIQUID theme.liquid
CODE HIGHLIGHT WITH FORTRAN STYLE
--------------------------------------------------------------------------------------------------------------------------------------------------
<script src="{{ 'lazysizes.js' | asset_url }}" async="async"></script>
<script src="{{ 'vendor.js' | asset_url }}" defer="defer"></script>
<script src="{{ 'theme.js' | asset_url }}" defer="defer"></script>
<script src="{{ 'ElevateZoom.js' | asset_url }}" defer="defer"></script>
<script src="{{ 'ZoomWindow.js' | asset_url }}" defer="defer"></script>
<link rel="stylesheet" href="{{ 'my.css' | asset_url }}" rel="stylesheet"/>
<link rel="stylesheet" href="{{ 'zoom2.scss' | asset_url }}" rel="stylesheet"/>
--------------------------------------------------------------------------------------------------------------------------
IMAGE ZOOM SHOPIFY ELEVATE USE ONE SMALL AND ONE BIG SIZE IMAGE
-------------------------------------------------------------------------------------------------------------------------
HOW FLEX SLIDER ADD IN SHOPIFY THEME
https://themes.shopify.com/themes/supply/styles/blue
https://woocommerce.com/flexslider/
How to use it:
1. Add these items to the <head> of your document
1 | <link rel="stylesheet" href="flexslider.css" type="text/css"> |
2 | <script src="https://ajax.googleapis.com/ajax/libs/jquery/1.6.2/jquery.min.js"></script> |
3 | <script src="jquery.flexslider.js"></script> |
2. Markup
01 | <div class="flexslider"> |
02 | <ul class="slides"> |
03 | <li> |
04 | <img src="slide1.jpg" /> |
05 | </li> |
06 | <li> |
07 | <img src="slide2.jpg" /> |
08 | </li> |
09 | <li> |
10 | <img src="slide3.jpg" /> |
11 | </li> |
12 | </ul> |
13 | </div> |
3. Call the function
1 | <!-- Placein the <head>, after the three links --> |
2 | <script type="text/javascript" charset="utf-8"> |
3 | $(window).load(function() { |
4 | $('.flexslider').flexslider(); |
5 | }); |
6 | </script> |
--------------------------------------------------------------------------------------------------------------------------
<html>
<head>
<link href="https://cdn.shopify.com/s/files/1/2261/4707/t/2/assets/theme.scss.css?v=15521285290808567413" rel="stylesheet" type="text/css" media="all" />
<script src="https://ajax.googleapis.com/ajax/libs/jquery/1.8.3/jquery.min.js" type="text/javascript"></script>
<script type="text/javascript" src="https://cdn.shopify.com/s/files/1/2261/4707/t/2/assets/Drift.min.js?v=14875652406493182065" defer="defer"></script>
<script src="https://cdn.shopify.com/s/files/1/2261/4707/t/2/assets/theme-zoom.js?v=10999129529911022596" defer="defer"></script>
</head>
<body>
<div class="image-container">
<img class="image-zoom" src="https://cdn.shopify.com/s/files/1/2261/4707/products/Lunchbag_Khaki_Front_8ae0e1f4-407d-4ac0-89e6-961b306ef351_480x480.jpg?v=1502376033" alt="Canvas Lunch Bag"
data-product-featured-image data-zoom="https://cdn.shopify.com/s/files/1/2261/4707/products/Lunchbag_Khaki_Front_8ae0e1f4-407d-4ac0-89e6-961b306ef351_1024x1024@2x.jpg?v=1502376033">
<div class="image-details"></div>
</div>
</body>
</html>
--------------------------------------------------------------------------------------------------------------------------
.slideshow__image.box.ratio-container.js.lazyloaded {
- height: 300px;
- width: 300px;
}
.slideshow__text-wrap {
- height: 300px;
- width: 300px;
- position: relative;
- background:
azure ;
}
--------------------------------------------------------------------------------------------------------------------------
<!DOCTYPE html>
<!-- https://stackoverflow.com/questions/52509956/how-to-replace-dots-to-numbers-to-letters-in-slick-js -->
<html>
<head>
<style>
.slider {
width: auto;
margin: 30px 50px 50px;
}
.slick-slide {
background: red;
color: white;
padding: 40px 0;
font-size: 30px;
font-family: "Arial", "Helvetica";
text-align: center;
}
.slick-prev:before,
.slick-next:before {
color: black;
}
.slick-dots {
bottom: -30px;
}
.slick-slide:nth-child(odd) {
background: gray;
}
</style>
<script src="/scripts/snippet-javascript-console.min.js?v=1"></script>
</head>
<body>
<link href="https://rawgit.com/kenwheeler/slick/master/slick/slick-theme.css" rel="stylesheet"/>
<link href="https://rawgit.com/kenwheeler/slick/master/slick/slick.css" rel="stylesheet"/>
<script src="https://ajax.googleapis.com/ajax/libs/jquery/2.1.1/jquery.min.js"></script>
<script src="https://rawgit.com/kenwheeler/slick/master/slick/slick.js"></script>
<section class="slider">
<div>slide1</div>
<div>slide2</div>
<div>slide3</div>
<div>slide4</div>
<div>slide5</div>
</section>
<script type="text/javascript">
var letters = ['A','B','C','D','E','F','G','H','I','J','K','L','M','N','O','P','Q','R','S','T','U','V','W','X','Y','Z'];
$(".slider").slick({
autoplay: false,
dots: true,
customPaging : function(slider, i) {
var thumb = $(slider.$slides[i]).data();
return '<a>'+letters[i]+'</a>';
},
responsive: [{
breakpoint: 500,
settings: {
dots: false,
arrows: false,
infinite: false,
slidesToShow: 2,
slidesToScroll: 2
}
}]
});
</script>
</body>
</html>
--------------------------------------------------------------------------------------------------------------------------
SHOPIFY SLIDER CHANGE WITH CSS CODE
-------------------------------------------------------------------------------------------------------------------------
.slideshow__arrows .slideshow__arrow-left,.slideshow__arrows .slideshow__arrow-right {
  cursor: pointer;
  position: absolute;
  top:-352%;
  width:auto;
  padding: 16px;
  margin-top: -22px;
  color: white;
  font-weight: bold;
  font-size: 18px;
  transition: 0.6s ease;
  border-radius: 0 3px 3px 0;
  user-select: none;
}

/* Position the "next button" to the right */
.slideshow__arrows .slideshow__arrow-right {
  right: 0;
  border-radius: 3px 0 0 3px;
}

.slideshow__arrows .slideshow__arrow-left {
    left: 0;
    border-radius: 3px 0 0 3px;
}


/* On hover, add a black background color with a little bit see-through */
.slideshow__arrows .slideshow__arrow-left:hover, .slideshow__arrows .slideshow__arrow-right:hover {
  background-color: rgba(0,0,0,0.8);
}


.slideshow__arrows {
 width: 74px;
 height: 44px;
}
-------------------------------------------------------------------------------------------------------------------------
SLICKY SLIDER JAVASCRIPT
-------------------------------------------------------------------------------------------------------------------------
<!-- https://stackoverflow.com/questions/45831233/how-to-add-a-slow-zoom-in-effect-to-slider-images-using-slick-slider/45831929 -->
<!DOCTYPE html>
<html>
<head>
</head>
<body>
<link href="https://cdnjs.cloudflare.com/ajax/libs/slick-carousel/1.6.0/slick-theme.css" rel="stylesheet"/>
<link href="https://cdnjs.cloudflare.com/ajax/libs/slick-carousel/1.6.0/slick.css" rel="stylesheet"/>
<style>
html, body {
margin: 0;
padding: 0;
}
* {
box-sizing: border-box;
}
.slider {
width: 50%;
margin: 30px auto;
}
.slick-slide {
margin: 0px 20px;
}
.slick-slide img {
width: 100%;
}
.slick-prev:before,
.slick-next:before {
color: black;
}
.slider-nav img{width: 15%;display: inline-block !important;float: left;margin: 10px 8px;}
</style>
<section class="slider regular">
<div>
<img src="http://placehold.it/350x300?text=1">
</div>
<div>
<img src="http://placehold.it/350x300?text=2">
</div>
<div>
<img src="http://placehold.it/350x300?text=3">
</div>
<div>
<img src="http://placehold.it/350x300?text=4">
</div>
<div>
<img src="http://placehold.it/350x300?text=5">
</div>
<!-- <div> -->
<!-- <img src="http://placehold.it/350x300?text=6"> -->
<!-- </div> -->
</section>
<section class="slider slider-nav">
<img src="http://placehold.it/350x300?text=1">
<img src="http://placehold.it/350x300?text=2">
<img src="http://placehold.it/350x300?text=3">
<img src="http://placehold.it/350x300?text=4">
<img src="http://placehold.it/350x300?text=5">
</section>
<script src="https://ajax.googleapis.com/ajax/libs/jquery/2.1.1/jquery.min.js"></script>
<script src="https://cdnjs.cloudflare.com/ajax/libs/slick-carousel/1.6.0/slick.min.js"></script>
<script type="text/javascript">
$(".regular").slick({
dots: false,
infinite: true,
slidesToShow: 2,
slidesToScroll: 1,
asNavFor: '.slider-nav',
autoPlay: true
});
$('.slider-nav').slick({
slidesToShow: 0,
slidesToScroll: 0,
asNavFor: '.regular',
dots: false,
focusOnSelect: true,
arrows: false,
});
</script>
</body>
</html>
-------------------------------------------------------------------------------------------------------------------------
-------------------------------------------------------------------------------------------------------------------------
<!-- https://stackoverflow.com/questions/45831233/how-to-add-a-slow-zoom-in-effect-to-slider-images-using-slick-slider/45831929 -->
<!DOCTYPE html>
<html>
<head>
</head>
<body>
<link href="https://cdnjs.cloudflare.com/ajax/libs/slick-carousel/1.6.0/slick-theme.css" rel="stylesheet"/>
<link href="https://cdnjs.cloudflare.com/ajax/libs/slick-carousel/1.6.0/slick.css" rel="stylesheet"/>
<style>
html, body {
margin: 0;
padding: 0;
}
* {
box-sizing: border-box;
}
.slider {
width: 50%;
margin: 30px auto;
}
.slick-slide {
margin: 0px 20px;
}
.slick-slide img {
width: 100%;
}
.slick-prev:before,
.slick-next:before {
color: black;
}
.slider-nav img{width: 15%;display: inline-block !important;float: left;margin: 10px 8px;}
</style>
<section class="slider regular">
<div>
<img src="http://placehold.it/350x300?text=1">
</div>
<div>
<img src="http://placehold.it/350x300?text=2">
</div>
<div>
<img src="http://placehold.it/350x300?text=3">
</div>
<div>
<img src="http://placehold.it/350x300?text=4">
</div>
<div>
<img src="http://placehold.it/350x300?text=5">
</div>
<!-- <div> -->
<!-- <img src="http://placehold.it/350x300?text=6"> -->
<!-- </div> -->
</section>
<section class="slider slider-nav">
<img src="http://placehold.it/350x300?text=1">
<img src="http://placehold.it/350x300?text=2">
<img src="http://placehold.it/350x300?text=3">
<img src="http://placehold.it/350x300?text=4">
<img src="http://placehold.it/350x300?text=5">
</section>
<script src="https://ajax.googleapis.com/ajax/libs/jquery/2.1.1/jquery.min.js"></script>
<script src="https://cdnjs.cloudflare.com/ajax/libs/slick-carousel/1.6.0/slick.min.js"></script>
<script type="text/javascript">
$(".regular").slick({
dots: false,
infinite: true,
slidesToShow: 2,
slidesToScroll: 1,
asNavFor: '.slider-nav',
autoPlay: true
});
$('.slider-nav').slick({
slidesToShow: 0,
slidesToScroll: 0,
asNavFor: '.regular',
dots: false,
focusOnSelect: true,
arrows: false,
});
</script>
</body>
</html>
-------------------------------------------------------------------------------------------------------------------------
Subscribe to:
Post Comments (Atom)


0 comments:
Post a Comment